
In the ever-evolving tech landscape, the call for efficient and reliable ways to deploy applications is ringing louder than ever. But no worries! Thanks to robust tools like GitHub Actions, Docker, and the AWS Services, automating the deployment of ASP.NET Core applications to AWS ECS has become a lot easier.
This is our third post in the series of building a Slack Bot hosted in AWS. In this post we’ll delve into how to create and host our ASP.NET Core API on an Elastic Container Server (ECS).
💻 How to Create a Custom Slack Bot with .NET 7
🚀 Creating a Minimal API With ASP.NET Core That Interacts With AWS DynamoDB
🔧 Creating and Hosting An Application on AWS Elastic Container Service (ECS)
🚢Continuous Deployment with GitHub Actions to AWS Elastic Container Service (ECS)
In this tutorial, I walk you through creating a docker file for our application, I’ll break down the process of setting up an ECS, including understanding IAM Roles, getting a grip on clusters, tasks, and services. So, let’s dive in!
Constructing a Dockerfile for .NET 7 WebAPI
First off, we’ll dive into Docker and create a Dockerfile for our .NET 7 WebAPI application. For those unfamiliar with Docker, it’s a tool designed to simplify the process of creating, deploying, and running applications by using containers. Here’s how you create a Dockerfile:
Step 1: Initiating the Dockerfile
In your .NET 7 WebAPI project’s root directory, let’s create a new file named Dockerfile. No need for any file extensions here!
If you’ve been following my previous blogs, we’ll be creating a Dockerfile for the SlackBot.WebAPI project. You can reference the blog post on building this here.
Step 2: Establishing the Base Image
Open up this file in your IDE, I’m using Visual Studio Code. We first need to set the base image. For our .NET 7 WebAPI, we’ll use the mcr.microsoft.com/dotnet/sdk:7.0 as the base image. This image comes with the .NET 7 SDK that will allow us to build and run our application. At the top of the file, add the following
FROM mcr.microsoft.com/dotnet/sdk:7.0 AS build
Step 3: Designating the Working Directory
We’ll set the working directory within the Docker container. This is where our application files will be copied to.
WORKDIR /app
Step 4: Transferring the Project Files
Let’s copy the project files into the Docker container’s working directory. This includes the .csproj files and any other necessary files needed to build the application.
COPY ./*.csproj ./
Step 5: Restoring Dependencies
The dotnet restore command is up next. This will restore the project’s dependencies.
RUN dotnet restore
Step 6: Copying the Application Code
Following that, we’ll copy the remaining application code into the Docker container’s working directory.
COPY . .
Step 7: Building the Application
Time to build the .NET 7 WebAPI application! We’ll use the dotnet build command for this.
RUN dotnet build --configuration Release
Step 8: Publishing the Application
Let’s publish the application next. This will specify the desired target framework and output directory.
RUN dotnet publish --configuration Release --no-restore --output ./out
Step 9: Defining the Runtime Image
In this step, we’ll define the final runtime image for our application. For this, we’ll use the mcr.microsoft.com/dotnet/aspnet:7.0 image. This includes all necessary runtime components to run our .NET 7 WebAPI application.
FROM mcr.microsoft.com/dotnet/aspnet:7.0 AS runtime
💡 Quick Tip: One of the reasons for defining a separate runtime image in a Dockerfile is to achieve smaller Docker image sizes. This is done by separating the build environment
Step 10: Expose the Port
Your application needs a window to the outside world, and that’s achieved by exposing port 80. We’ll be making use of this port when the time comes to uplift our creation into the ECS container. Here’s how you can make it happen:
EXPOSE 80
Step 11: Copy the Published Output
Once your application is in its prime, it’s time to transport it from the build image to the runtime image. Here’s the command to bridge this journey:
COPY --from=build /app/out .
Step 12: Define the Container Entry Point
Every play needs an opening act, and in the world of Docker, this is the command that gets to take center stage when your container comes to life. In our case, that’s starting up our .NET 7 WebAPI application:
ENTRYPOINT ["dotnet", "SlackBot.WebApi.dll"]
💡Remember to change 'SlackBot.WebApi.dll’ to match your ownproject's name!
There you have it! Your Dockerfile is ready to serve your .NET 7 WebAPI application. With this Dockerfile, you’re prepared to build a Docker image and set your application free in a containerized world.
Testing Our Docker File Locally
Never forget the adage, ‘measure twice, cut once’. It’s vital to stress test your Dockerfile in a local setting to ensure it behaves as expected before setting it loose on an ECS container. You’ll find troubleshooting much easier task on home turf than in the unfamiliar landscape of an ECS environment.
Before we delve into the nuts and bolts of testing, ensure that Docker Desktop and the Docker CLI (Command Line Interface) are installed and ready on your machine. These two tools are the bedrock of your Docker workspace and the key to interacting efficiently with containers.
To equip yourself with Docker Desktop and the CLI, visit Docker’s official website at: Docker.com. Here, you’ll find the suitable installation files and a roadmap to installation for your specific operating system.
Once your Docker environment is set up, follow these steps to test your Dockerfile locally:
To test your Dockerfile locally, you can follow these steps:
- Building the Docker Image: The
docker buildcommand is your go-to for creating a Docker image from your Dockerfile. Just remember to be in the right place (the directory containing your Dockerfile) and name your image appropriately:
docker build -t slackbot-webapi:latest .
💡 You can change 'slackbot-webapi' to your preferred Docker image name.
The initial build may seem like a marathon, as it requires downloading the base and runtime images. But thanks to Docker’s caching feature your subsequent builds will be a lot faster.
- Launching Your Docker Image: Having constructed the image, it’s time to bring it to life as a container. The
docker runcommand lets you breathe life into your container, while also allowing you to set a variety of parameters such as port mappings and environment variables:
docker run -p 8080:80 slackbot-webapi:latest
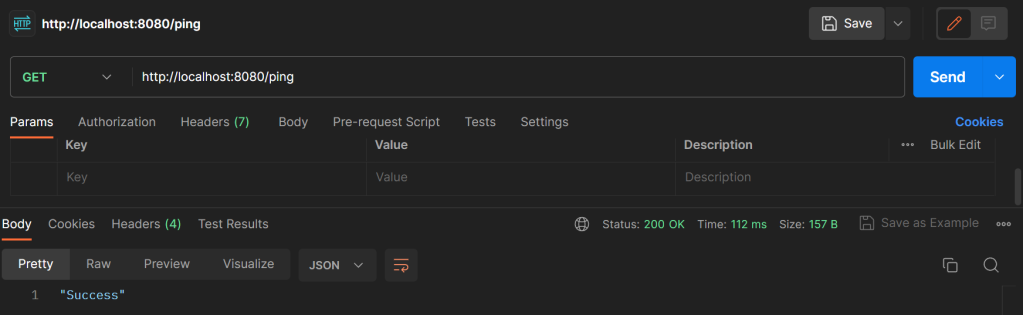
- Checking the Health of Your Application: With your container up and running, you’re now able to interact with the encapsulated application. Use your preferred method (be it a web browser, cURL, or Postman) to poke and prod at your application via the designated port (
localhost:8080, in our example). Run your test cases to ensure everything is working perfectly. If you’ve been following along in this blog series, we can give our Docker container a whirl by calling the /ping endpoint. Using Postman and setting the route to http://localhost:8080/ping, you should receive a warm ‘Success’ in response. And remember, we’re in the realm of Http, not Https.
- Iteration Station: Debug and Iterate: It’s only natural that you might encounter a few bumps on the road. If your tests unearth any issues, simply tweak your Dockerfile or application code and loop back to the build and run steps. Repeating this process in a local setting allows for efficient debugging, helping you refine your Dockerfile until it hits all the right notes.
Local testing is your safety net, letting you snag any potential issues before they have a chance to create bigger problems in the ECS environment. It smooths the path for deployment and ensures your application shines in its containerized form on ECS.
Setting Up an IAM User for ECS Cluster, Task, Service, and ECR Access
As we gear up to craft our ECS cluster, task and service, it’s crucial that we first equip an IAM user with the necessary permissions to handle these operations.
💡 It's crucial to only grant the IAM user the exact permissions required to perform its designated tasks and services.
Step 1: Access the AWS Management Console
Access and sign into the AWS Management Console. Open the IAM console by typing IAM into the search bar on the main AWS Console homepage.
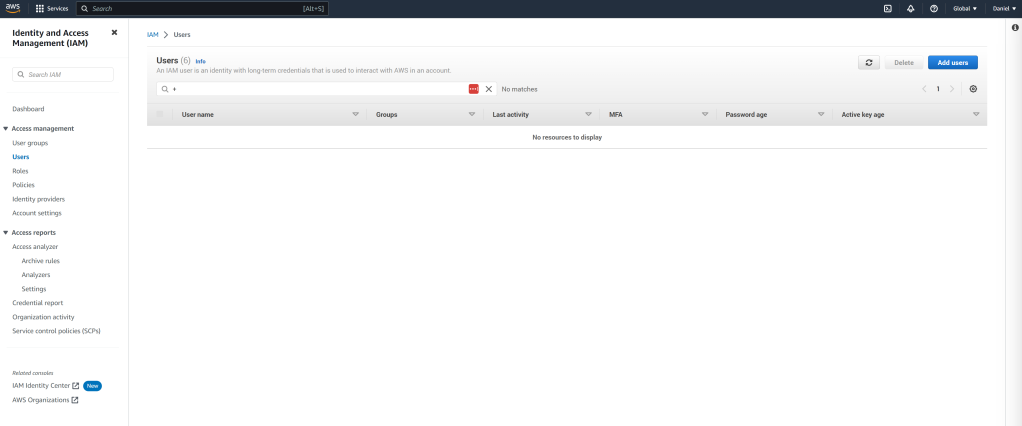
Step 2: Create a New User
In the navigation pane, choose “Users” and then “Add user”. Choose a unique username for your IAM user, for this guide, we’ll be using ‘SlackBotECSClusterCreator’. Once done, select “Next”.
Step 3: Set Permissions
On the “Set permissions” page, opt for “Attach existing policies directly”. Search for and select the following policies:
- AmazonEC2ContainerRegistryFullAccess: This policy equips your IAM user with full access to Amazon ECR resources.
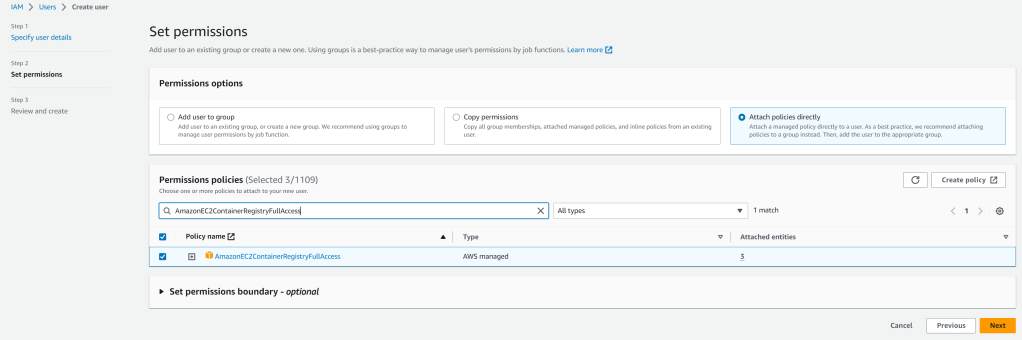
After selecting these policies, choose “Next”.
Step 4: Review and Create User
Review your user details and the selected policies to ensure they are correct. When everything aligns with your needs, choose “Create user”.
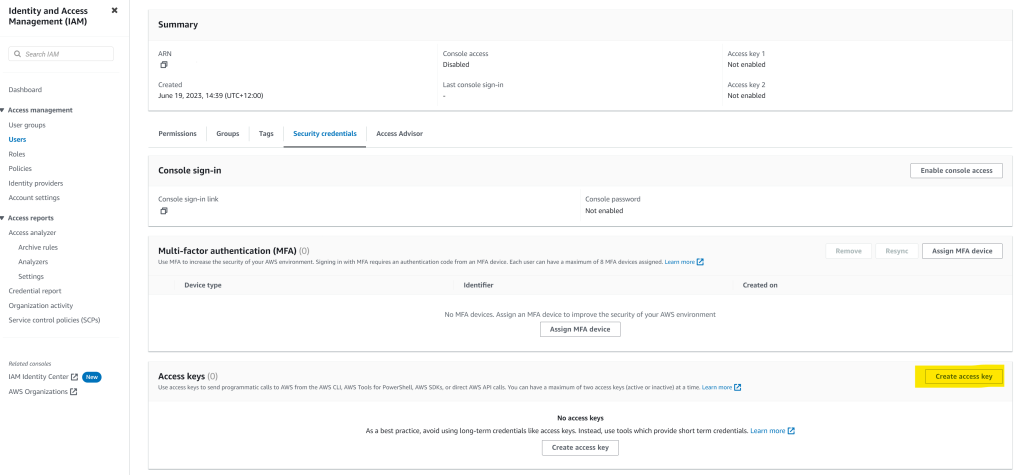
Step 5: Generate Access Key and Secret Key
After the user is successfully created, select the user under “Users” on the main IAM page. Navigate to the “Security Credentials” tab, click on “Create access key”, and follow the instructions to generate an access key and secret key. Remember to keep them safe.
Step 6: Configure AWS CLI
Open your CLI and enter the command aws configure. You will be asked to input your access key and secret key, which you secured from the previous step. Also specify the region where you want your ECS cluster to be set up. When it comes to the default output format, you can leave it blank. Hit enter to finalize your AWS key setup. This action will generate two files: a credentials file (hosting your access and secret key) and a config file (containing your chosen region).
💡 Don't forget, you'll need the AWS CLI installed on your system. For installation instructions and to configure the CLI, refer to the AWS CLI User Guide.
Uploading the Project to AWS ECR
Before diving into the creation of our cluster, service, and task in Amazon Elastic Container Service (ECS), it is necessary to upload our SlackBot.WebApi project to Amazon Elastic Container Registry (ECR). This step will enable us to form a task definition based on our uploaded project. Let’s take it step by step.
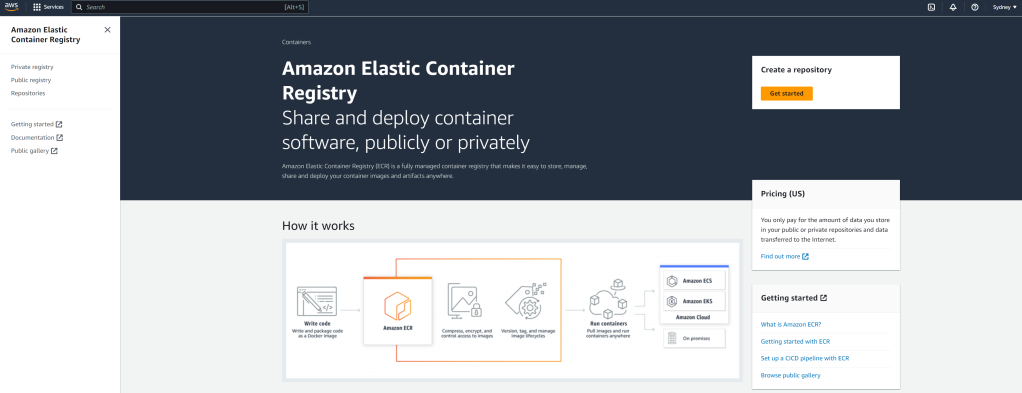
Step 1: Navigate to Amazon ECR
Begin by opening the AWS Management Console and heading over to ECS. From the submenu on the left-hand side, select Amazon ECR.
Step 2: Initiate Repository Creation
Click on “Get started” to jumpstart the process of repository creation.
Step 3: Name Your Repository
Upon landing on the “Create repository” page, it’s time to provide a name for your project repository. For instance, you could use “slackbot.webapi”.
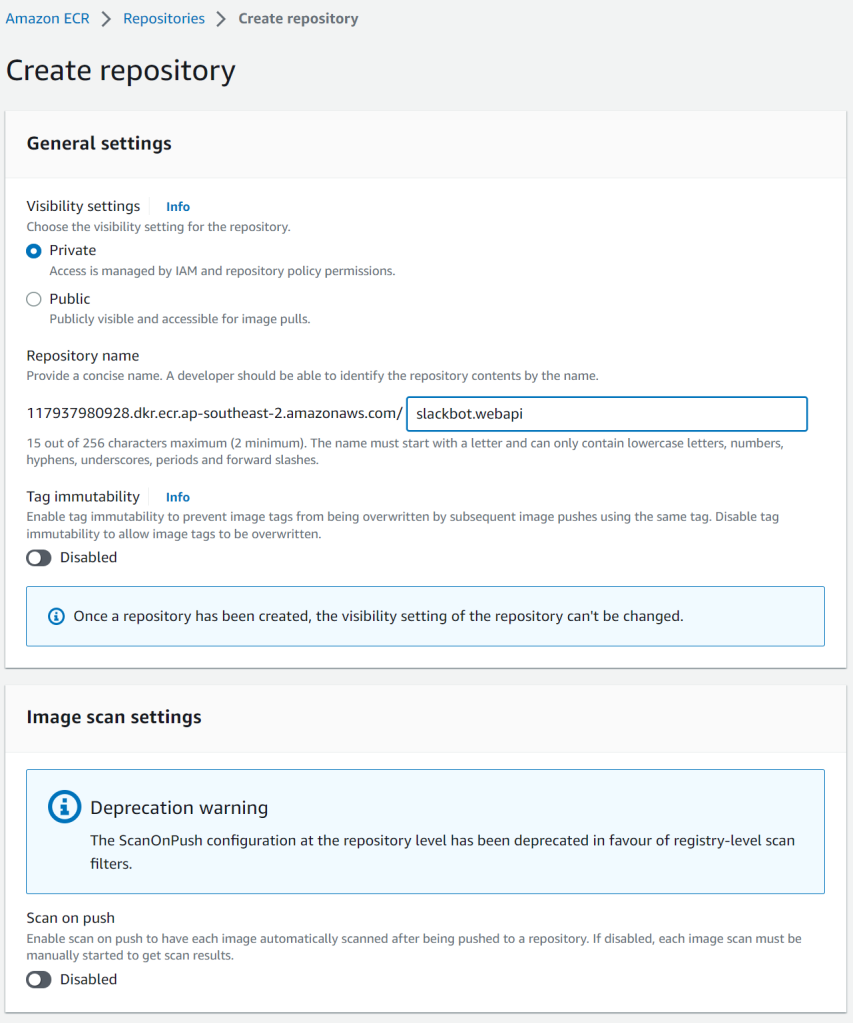
Step 4: Create Repository
Take a moment to review all the settings and configurations for the repository, ensuring they align with your needs. When you’re satisfied, click on “Create repository”.
Step 5: Select the New Repository
Post creation, select the repository you’ve just created from the list of available repositories.
Step 6: Access Push Commands
Once inside the repository details page, spot the “View push commands” button. By clicking on it, you can see the commands necessary to push your project to the repository.

Step 7: Execute Push Commands
Make sure to follow each command provided in the “View push commands” section to push your SlackBot.WebApi project to the ECR repository.
Once the upload is done, your project should appear listed in AWS ECR, signalling a successful upload.
Congrats! You’ve now successfully uploaded your SlackBot.WebApi project to AWS ECR. This enables us to proceed to the creation of a task definition for your project in the subsequent steps.
Creating a TaskRole
Creating an ECS (Elastic Container Service) TaskRole is an integral part of managing tasks and containers within the ECS environment. TaskRoles are crucial in providing the needed permissions and access controls for your tasks to interact with other AWS services or resources. Let’s begin the process.
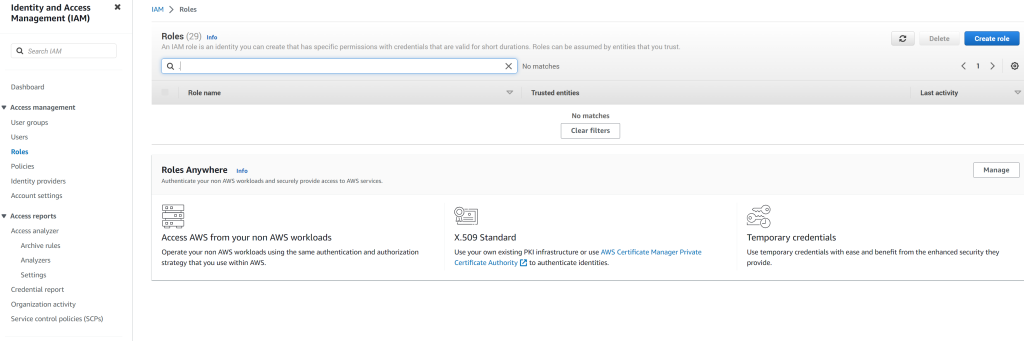
Step 1: Access IAM Service
Navigate to the AWS Management Console and select the IAM (Identity and Access Management) service.
Step 2: Initiate Role Creation
Click on “Roles” from the sidebar on the left-hand side, then press the “Create role” button.
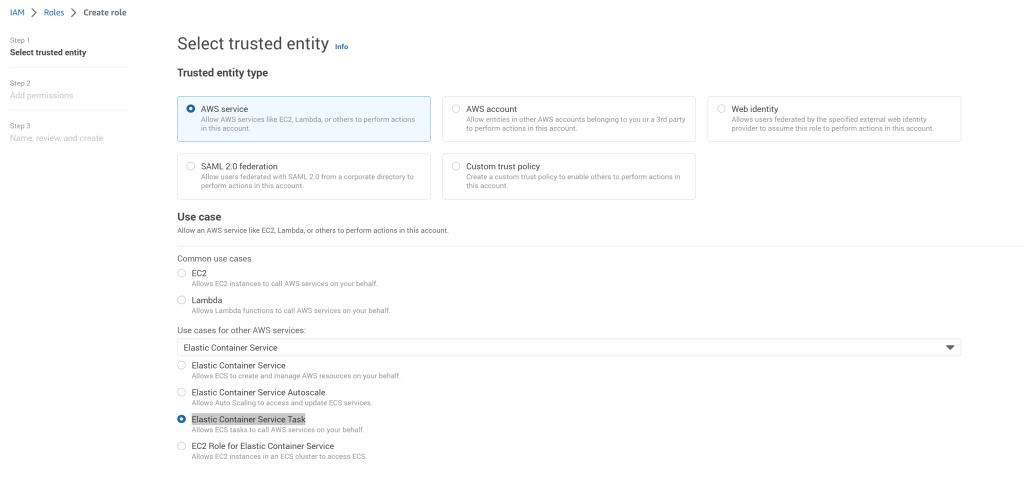
Step 3: Select Service for Role
Search for and select “Elastic Container Service”. Then opt for the “Elastic Container Service Task” and press “Next”.
Step 4: Attach Permissions Policies
On the “Attach permissions policies” page, you can either go with an existing policy or tailor a custom policy to suit your role’s needs. Should you have a specific set of permissions in mind, tap “Create policy” to define a custom policy. In this guide, we’re searching for and attaching the following:
- AmazonECS_FullAccess
- AmazonDynamoDBFullAccess
- CloudWatchFullAccess
After appending these permissions, click “Next”.
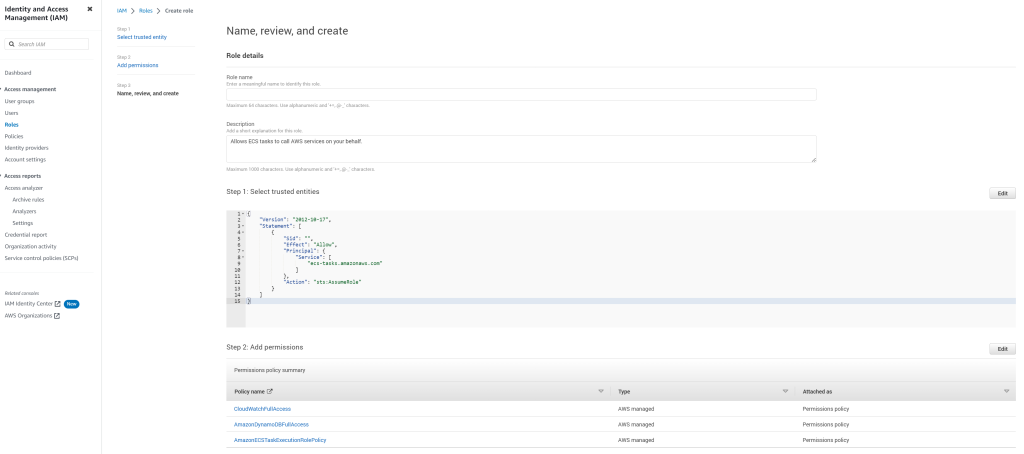
Step 5: Name Your Role
Provide a unique name for your role, and optionally, a description. Ensure to select the “Task” option in the “Role type” section. To create the Role, simply click “Create role”.
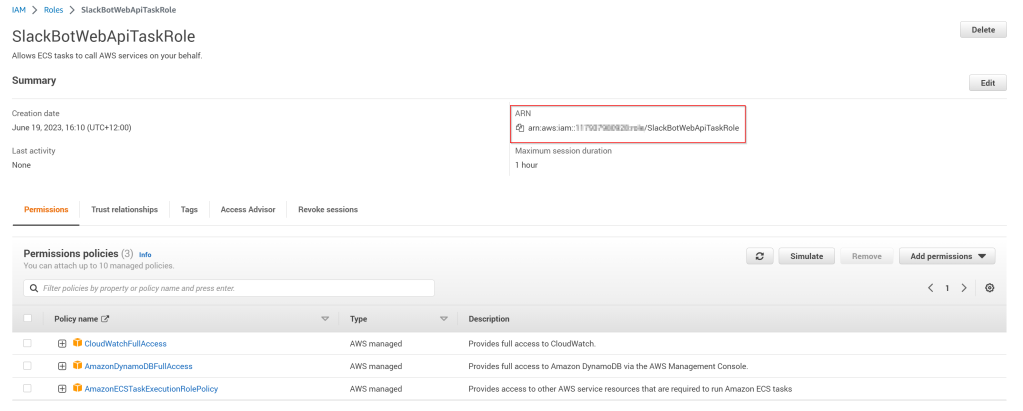
Step 6: Retrieve the Role’s ARN
Finally, select the Role we just created. You need to copy the Role’s ARN (Amazon Resource Name) as we will be utilizing it shortly when we create our ECS task.
Create an Amazon ECS Cluster with AWS Fargate
Take note that depending on the timeframe when you are reading this blog, there might be an older and a newer ECS experience available. For this guide, I will be utilizing the newer ECS experience to create the cluster, service, and tasks.
Let’s navigate through the steps of setting up an ECS cluster with AWS Fargate.
Step 1: Head to the ECS Service
In the AWS Management Console, in the services search bar locate and select the ECS service.
Step 2: Reach the Clusters Dashboard
Once inside the Amazon ECS dashboard, click on “Clusters” in the menu located on the left-hand side.
Step 3: Initiate Cluster Creation
Within the Clusters dashboard, locate the “Create Cluster” button and click on it to trigger the cluster creation process.
Step 4: Name Your ECS Cluster
When asked, provide a descriptive name for your ECS cluster. For instance, you can name it “SlackBot” to indicate the cluster’s purpose.
Step 5: Select AWS Fargate as the Infrastructure
By default, AWS Fargate is selected as the infrastructure option. We’ll continue with AWS Fargate for our SlackBot application.
💡AWS Fargate is a serverless, pay-as-you-go compute engine that lets you concentrate on developing applications without the need to manage servers. It's compatible with both Amazon Elastic Container Service (ECS) and Amazon Elastic Kubernetes Service (EKS)."
Step 6: Review and Generate the Cluster
Take a pause to review the cluster configuration and settings. If everything checks out, click the “Create” button to form your ECS cluster.
Step 7: View Cluster Details
Post initiation of the cluster creation process, you’ll be redirected to the cluster details page. Here, you can observe essential information about your cluster, including the cluster ARN, status, and other specifics.
Note: The process of creating the cluster might require some time to complete.

Creating a Task Definitions in the AWS Console
Before we dive into the steps of creating our task definition, let’s take a brief moment to understand what a task definition is and why it is integral to our process. A task definition in the AWS ECS framework is like a blueprint for your application. It specifies various parameters for your application such as the Docker image to use, the required CPU and memory, the Docker networking mode, and more. Essentially, it describes the particular elements and settings that AWS should use to run your application containers.
In our scenario, crafting a task definition is a crucial stage because it tailors how our application – the SlackBot Web API – is going to function in the ECS environment. By defining our tasks accurately, we ensure that our application has all the necessary resources and permissions to run efficiently and securely within our ECS cluster.
Now that we’ve grasped the essence of task definition, let’s forge ahead and create on
Step 1: Initiate Task Definition Creation
In the ECS console, find “Task Definitions” in the navigation menu located on the left-hand side, and hit the “Create new Task Definition” button.
Step 2: Task Definition Configuration
Assign a name to the task definition. For instance, let’s name it ‘SlackBotWebApiTask’.
Step 3: Set up the Container
To include the image URI, visit your ECR repository and find the URI for the most recent image.
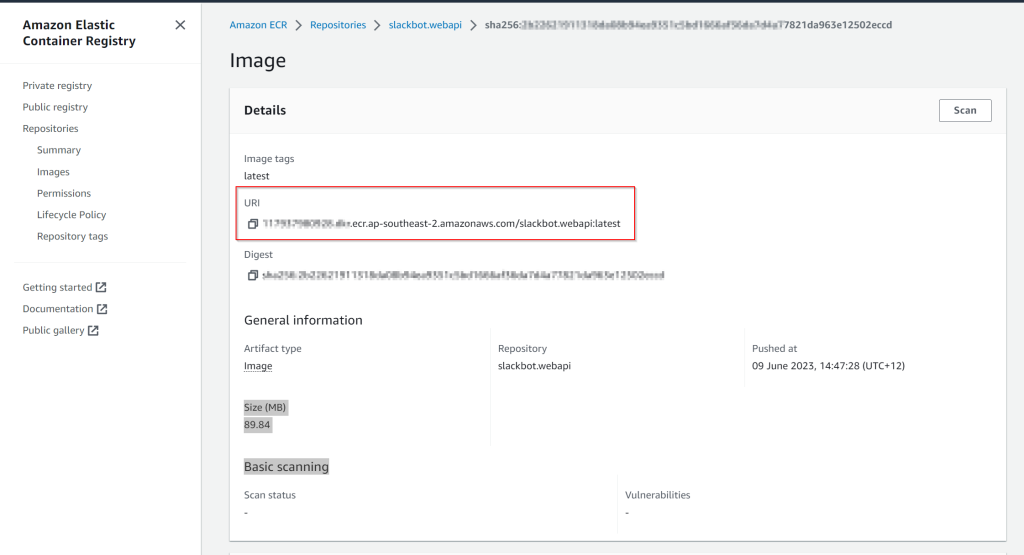
Add this URI to your Task Definition under the Image URI field and click Next.
Step 4: Adjust Environment, Storage, Monitoring, and Tags
Make sure that AWS Fargate is chosen under the App Environment. Modify the CPU and Memory settings as required, and proceed by clicking ‘next’.

Step 5: Review and Generate
Overlook the details of your task definition, and when you’re ready, hit ‘create’.
Your task definition is now created and primed for usage by your service. The subsequent step involves the creation of the service.
Creating a Service in the AWS Console
After crafting our task definition, the subsequent step is to set up a service within our ECS cluster. In AWS ECS, a service maintains the specified number of instances of a task definition simultaneously in an ECS cluster. This is an invaluable asset when we need to run and manage a specified number of instances of our SlackBot WebAPI task definition, for example.
Now let’s dive into the procedure of creating a service in the AWS console.
Step 1: Navigate to Your ECS Cluster
Start by accessing the ECS console and selecting “Clusters” from the left-hand navigation menu. Locate and click on the cluster you previously created. In our case, it’s named “SlackBot”.
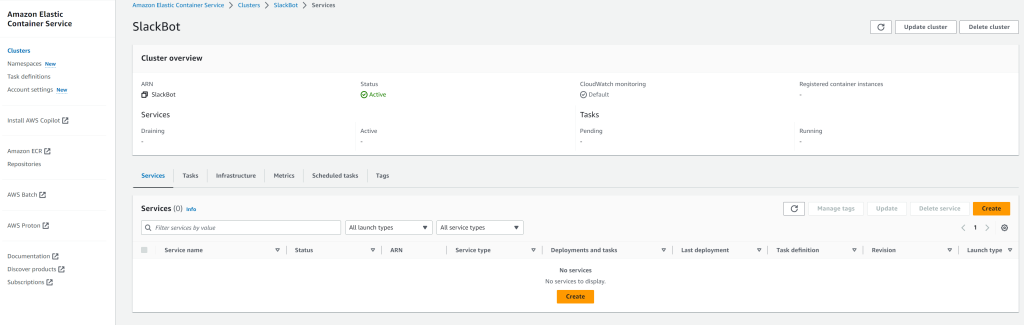
Step 2: Initiate Service Creation
Find and click the “Create” button to initiate the process of creating a new service.
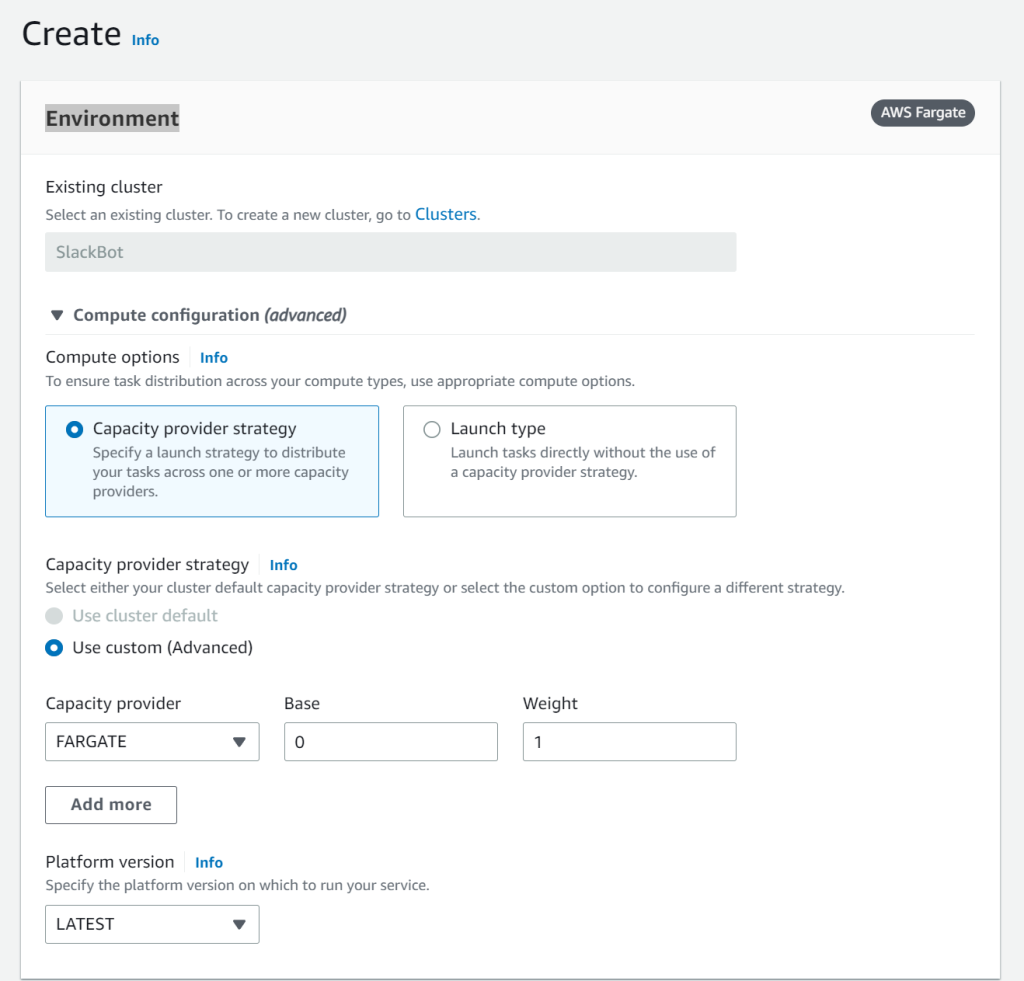
Step 3: Configure Environment
In the “Environment” section, you can leave the default settings untouched.
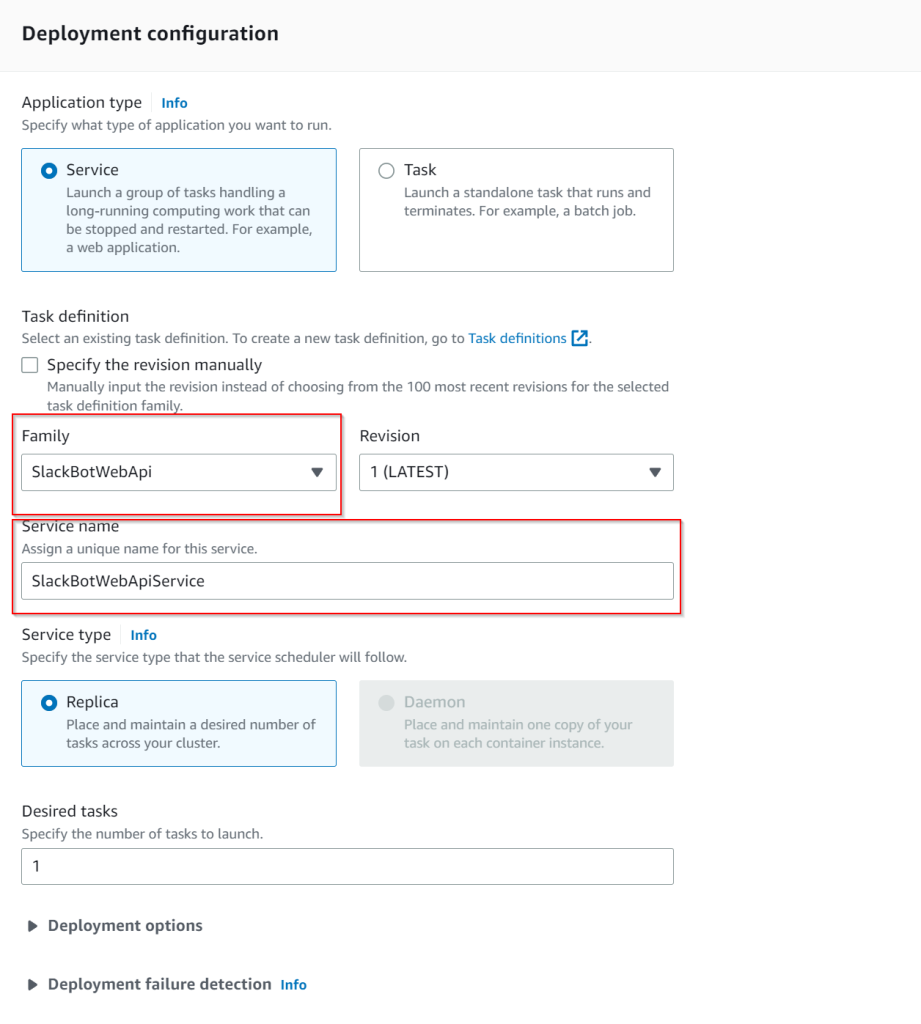
Step 4: Specify Deployment Configuration
Provide a unique name for your service. Then, under the “Family” dropdown menu, select your previously defined task definition.
Step 5: Set Up Load Balancer
Next, we’ll configure a load balancer. This ensures a static URI that we can use to access our service. This is particularly important because, when we integrate our Slackbot console application, we’ll need a consistent endpoint to call our SlackBot Web API.
In the service creation interface, scroll down to the “Load Balancing” section.
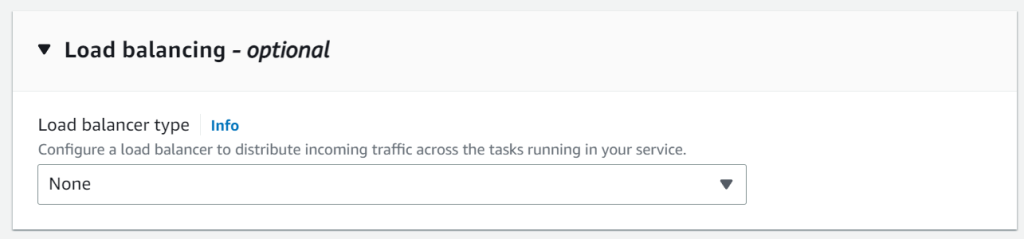
- Choose ‘Application Load Balancer’ for the “Load balancer type”.
- Specify a name for your Load balancer. For example, “SlackBotWebApi-LoadBalancer”.
- Under “Target group”, provide a unique name. We’ll use “SlackBotWebApi-TargetGroup” in our case.
- Additionally, specify “/ping” for the health check. This is because we added a ping health check when creating our web API in the previous steps.

Step 6: Create the Service
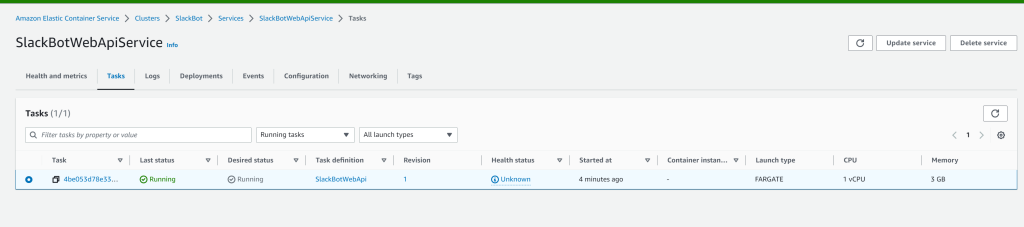
After ensuring all settings are correct, click “Create” to launch your service. Please note that this might take a few minutes.
Upon successful creation, you’ll be able to see your task running smoothly within your newly established cluster and service.
With the service operational, you can utilize the ECS console to supervise its status, examine logs, and control
Incorporating an Inbound Rule to the Security Group
To ensure our task is accessible, we need to add an inbound rule to the security group associated with the task. This allows HTTP traffic from our IP address to reach our running task.
Here’s how you can achieve this:
Step 1: Locate Your Running Task
Navigate to your ECS cluster, and find your running task.
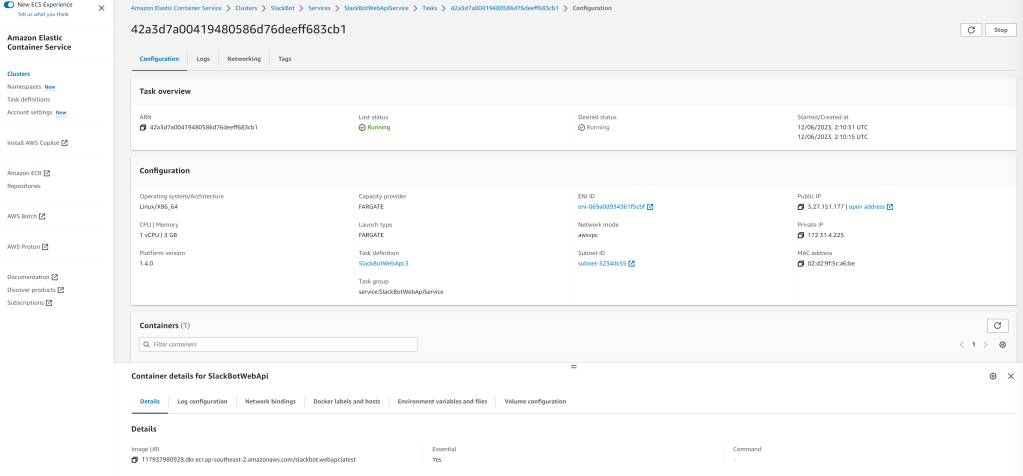
Step 2: Identify the ENI ID
Select the Elastic Network Interface (ENI) ID associated with the task.
Step 3: Open Security Group Settings
Next, click on the security group under the ‘Security group names’ column. In our case, it’s labeled as ‘default’.

Step 4: Modify Inbound Rules
Now, under the ‘Inbound Rules’ tab, click on ‘Edit inbound rules’.
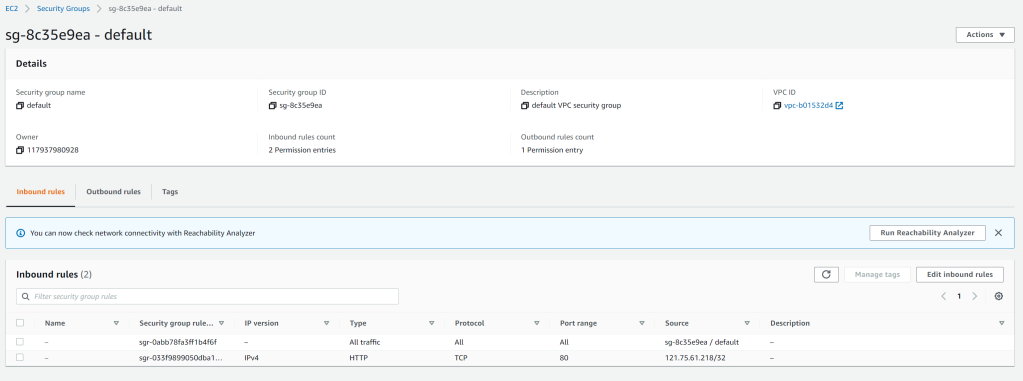
Step 5: Configure a New Rule
We should now be able to make a call out to our running task
In the rule configuration, select ‘HTTP’ for the type. For the ‘Source’ field, choose ‘My IP’. This setting ensures only traffic from your IP can access the task.
Step 6: Save Your Changes
Once you’ve set the rule parameters, click on ‘Save rule’ to apply your changes.
Now, you should be able to send an HTTP request to your running task successfully. Remember, only the IP address you specified in the rule can access the task.
Evaluating the SlackBot WebAPI
With the SlackBot WebAPI now actively running within our ECS cluster, it’s time to test it by pinging the endpoint we’ve set up.
To do this, we need to locate the Uniform Resource Identifier (URI) assigned by our load balancer:
Step 1: Select Cluster and Service
Access your selected cluster and the corresponding service.

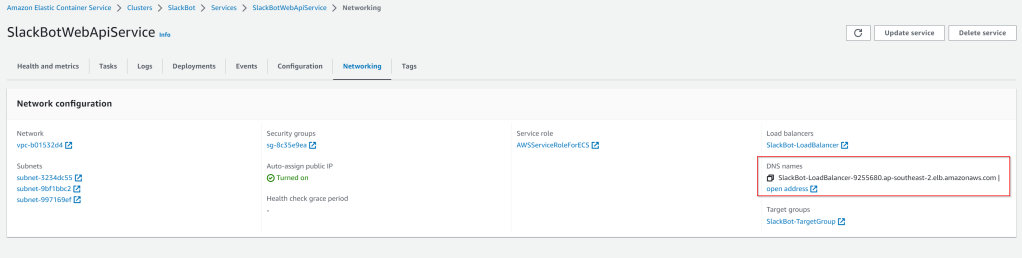
Step 2: Find the DNS Names
Navigate to the ‘Networking’ tab, and locate the Domain Name System (DNS) names.
Step 3: Use Postman to Test the Endpoint
Open Postman and input the DNS name, followed by the /ping route.
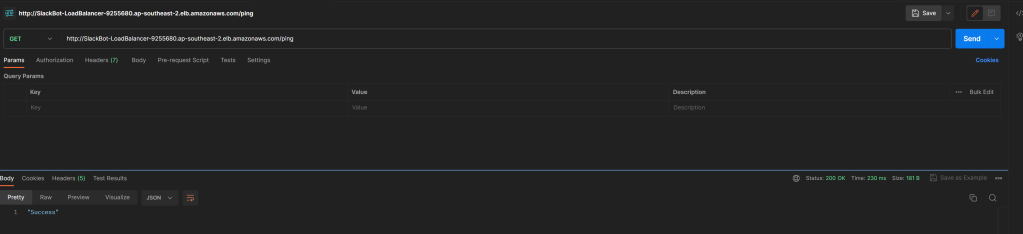
A successful response will yield a ‘Success’ message with a 200 status. Congratulations on achieving this milestone! 👐
Subscribe to stay updated with our latest posts!
Final Thoughts
At this point, you’ve successfully established an ECS cluster and service with our application running as a task. You can interact with this task via Postman. Your next task would be to replicate this process for the console application. As we’ve already outlined the steps, consider this as an engaging challenge to undertake.
Feel free to share your experiences or ask for help in the comments section.
In the following blog post, we’ll delve into creating a Github action to facilitate a continuous deployment pipeline. This will ensure that every change you push to Github is automatically deployed to our ECS service. Stay tuned!

[…] 🔧Creating and Hosting An Application on AWS Elastic Container Service (ECS) […]
LikeLike
[…] Creating and Hosting An Application on AWS Elastic Container Service (ECS) – Daniel Donbavand says: June 19, 2023 at 6:27 pm […]
LikeLike
[…] 🔧 Creating and Hosting An Application on AWS Elastic Container Service (ECS) […]
LikeLike