
Introduction
Recently, I’ve been exploring Redis and its potential beyond merely being a cache service. In this post, I’ll show you how to use Redis as a fast and scalable data store for your .NET 7 applications. We’ll create a Blazor Server application with a .NET 7 minimal API back end that uses Redis to implement a real-time scoreboard for multiple players. I’ll also discuss why and when to use Redis, and how it differs from other data stores.
Redis: What’s the Big Deal?
Redis is a fully managed, in-memory data store providing high performance, availability, and scalability for your applications. It supports various data structures such as strings, hashes, lists, sets, sorted sets, bitmaps, hyperloglogs, streams, and geospatial indexes. Additionally, it supports transactions, Lua scripting, Pub/Sub messaging, and cluster mode for horizontal scaling and high availability.
While commonly used as a cache service to reduce latency and load, Redis can serve as a primary data store for specific use cases that require rapid and frequent read/write operations on small pieces of data.
Redis: When to Use It?
Consider using Redis when you:
- Need sub-millisecond response times for data access
- Need to handle high-throughput and concurrent requests
- Need to support complex data structures and operations not supported by other data stores
- Need to implement real-time features such as notifications, messaging, or streaming
Building a Blazor Server Application with .NET 7 and Redis
Prerequisites
To follow this tutorial, you will need:
- .NET 7 SDK installed on your machine
- Visual Studio 2022 or Visual Studio Code
Creating the Blazor Server Project
- Create the Project: Use the following command in your terminal:
dotnet new blazorserver -n ScoreBoard
- This will create a new folder named ScoreBoard with the basic files and dependencies for a Blazor Server project.
- Add StackExchange.Redis NuGet Package: Navigate to your newly created solution and use the following command:
dotnet add package StackExchange.Redis
- Add Swagger UI Package for API Testing: (Optional)
dotnet add package Swashbuckle.AspNetCore
We’ll be using this package shortly to set up Swagger UI for testing our API endpoints.
Creating the Minimal API Back End
Now, let’s dive into creating the minimal API back end within the same project. Fire up your IDE; I’m using Rider, but you can use Visual Studio or any other IDE you prefer.
Setting Up SwaggerUI
If you’ve chosen to use Swagger UI for testing, here’s how to set it up:
- Add Swagger Generation Service: Open the Program.cs file and add the following line:
builder.Services.AddSwaggerGen();
- Enable Swagger in Development Environment: Add the following lines to ensure that Swagger is only exposed when developing locally:
if (app.Environment.IsDevelopment())
{
    app.UseSwagger();
    app.UseSwaggerUI();
}
- Use EndpointsApiExplorer: Add this line to enable EndpointsApiExplorer, a nifty .NET 6 feature that’s handy for Swagger documentation:
builder.Services.AddEndpointsApiExplorer();
Running the Application
Run your application to confirm that it’s all working as expected. By default, the Blazor front end will show. Add /swagger/index.html to the URL to access Swagger UI. Since we haven’t set any endpoints yet, you’ll see “No operations defined in spec!”—don’t worry, that’s expected at this stage.
Creating our RedisService
Create a service class named RedisService.cs under a folder called Services to handle the connection to Redis and data operations. The code for this class is shown below:
using StackExchange.Redis;
namespace ScoreBoard.Services;
public class RedisService
{
    private readonly ConnectionMultiplexer _connection;
    private readonly IDatabase _database;
    public RedisService(IConfiguration configuration)
    {
        // Get the connection string from appsettings.json
        var connectionString = configuration.GetConnectionString("Redis");
        // Create a connection multiplexer object that handles the communication with Redis
        _connection = ConnectionMultiplexer.Connect(connectionString);
        // Get the default database from the connection object
        _database = _connection.GetDatabase();
    }
    // A method that adds or updates a player's score in Redis using a sorted set data structure
     public async Task AddOrUpdateScoreAsync(ScoreRequest request)
    {
        // Use the SortedSetAddAsync method to add or update the score for the given player
        // The key of the sorted set is "scores" and the score is used as the score value
       await _database.SortedSetAddAsync("scores", request.Player, request.Score);
    }
    // A method that gets the top 10 players and their scores from Redis using a sorted set data structure
    public async Task<List<PlayerScores>> GetTopScoresAsync()
    {
        // Use the SortedSetRangeByRankWithScoresAsync method to get the top 10 elements from the sorted set
        // The key of the sorted set is "scores" and the order is descending
        var result = await _database.SortedSetRangeByRankWithScoresAsync("scores", 0, 9, Order.Descending);
        // Convert the result to a list of with player name and score
        return result.Select(x => new PlayerScores { Player = x.Element.ToString(), Score = (int)x.Score }).ToList();
    }
}
The RedisService class uses dependency injection to get the connection string of Redis from the appsettings.json file, creates a ConnectionMultiplexer object, and defines two methods: AddOrUpdateScoreAsync and GetTopScoresAsync.
We also need to create PlayerScores and ScoreRequest models:
- Create a folder named models.
- Create a class named PlayerScores with two properties:
public class PlayerScores
{
    public string Player { get; set; }
    public int Score { get; set; }
}
- Create a class named ScoreRequest with two properties:
public class ScoreRequest
{
    public string Player { get; set; }
    public int Score { get; set; }
}
Next, register the RedisService class as a singleton service in your Program.cs file:
builder.Services.AddSingleton<RedisService>();
Defining the Web API Endpoints
Define the web API endpoints directly within the Program.cs file, leveraging the new minimal API style introduced in .NET 6:
app.MapPost("/api/score", AddOrUpdateScore);
app.MapGet("/api/score", GetTopScores);
And add the following methods:
static async Task<IResult> AddOrUpdateScore([FromBody] ScoreRequest request, RedisService redisService, ILogger<Program> logger)
{
    try
    {
        await redisService.AddOrUpdateScoreAsync(player, score);
        return TypedResults.Ok();
    }
    catch (Exception ex)
    {
        logger.LogError(ex.Message);
        return TypedResults.StatusCode(StatusCodes.Status500InternalServerError);
    }
}
static async Task<IResult> GetTopScores(RedisService redisService, ILogger<Program> logger)
{
    try
    {
        var result = await redisService.GetTopScoresAsync();
        return TypedResults.Ok(result);
    }
    catch (Exception ex)
    {
        logger.LogError(ex.Message);
        return TypedResults.StatusCode(StatusCodes.Status500InternalServerError);
    }
}
Below shows the full Program.cs file
using Microsoft.AspNetCore.Mvc;
using ScoreBoard.Models;
using ScoreBoard.Services;

var builder = WebApplication.CreateBuilder(args);

// Add services to the container.
builder.Services.AddEndpointsApiExplorer();
builder.Services.AddSwaggerGen();
builder.Services.AddRazorPages();
builder.Services.AddServerSideBlazor();
builder.Services.AddSingleton<RedisService>();
builder.Services.AddHttpClient("ScoreboardClient", c =>
{
    c.BaseAddress = new Uri("http://localhost:5192");
});
var app = builder.Build();

if (app.Environment.IsDevelopment())
{
    app.UseSwagger();
    app.UseSwaggerUI();
}

// Configure the HTTP request pipeline.
if (!app.Environment.IsDevelopment())
{
    app.UseExceptionHandler("/Error");
    // The default HSTS value is 30 days. You may want to change this for production scenarios, see https://aka.ms/aspnetcore-hsts.
    app.UseHsts();
}

app.UseHttpsRedirection();

app.UseStaticFiles();

app.UseRouting();


app.MapBlazorHub();
app.MapFallbackToPage("/_Host");

app.MapPost("/api/score", AddOrUpdateScore);
app.MapGet("/api/score", GetTopScores);
app.Run();
static async Task<IResult> AddOrUpdateScore([FromBody] ScoreRequest request, RedisService redisService, ILogger<Program> logger)
{
    try
    {
        await redisService.AddOrUpdateScoreAsync(request);
        return TypedResults.Ok();
    }
    catch (Exception ex)
    {
        logger.LogError(ex.Message);
        return TypedResults.StatusCode(StatusCodes.Status500InternalServerError);
    }
}
static async Task<IResult> GetTopScores(RedisService redisService, ILogger<Program> logger)
{
    try
    {
        var result = await redisService.GetTopScoresAsync();
        return TypedResults.Ok(result);
    }
    catch (Exception ex)
    {
        logger.LogError(ex.Message);
        return TypedResults.StatusCode(StatusCodes.Status500InternalServerError);
    }
}
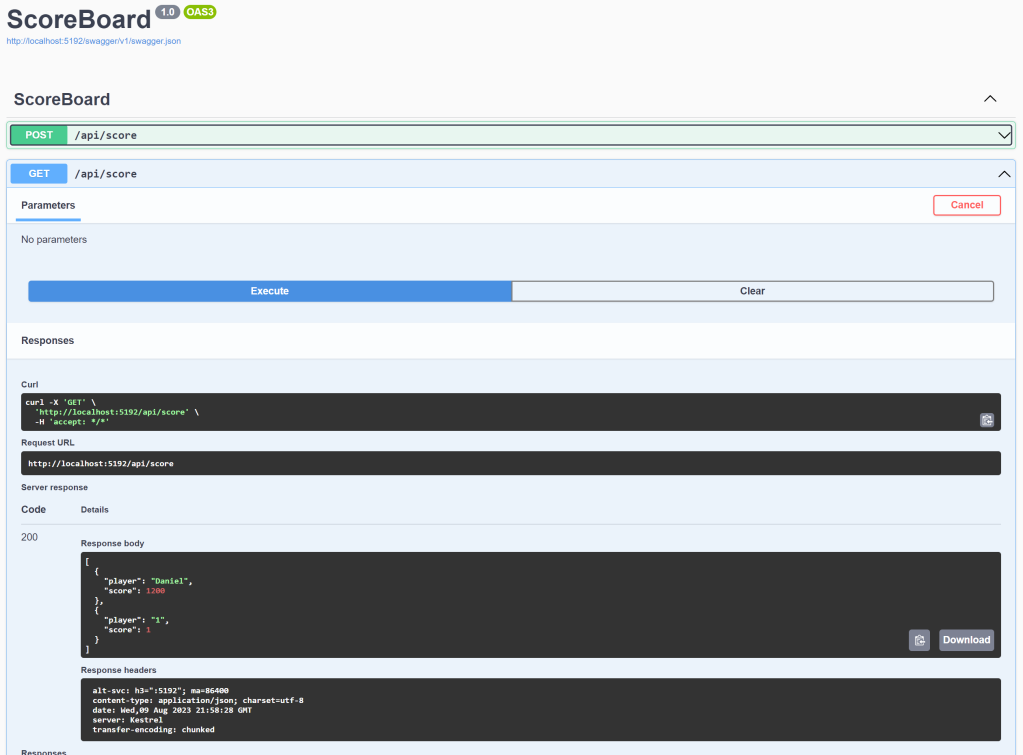
The full Program.cs file shows the necessary dependencies and defines two main endpoints:
- A POST endpoint to add or update scores
- A GET endpoint to retrieve the top scores
By defining these endpoints directly in the Program.cs file, you simplify the web API structure and eliminate the need for separate controller files. Your web API back end is now complete!
Fire up the app locally and use SwaggerUI to test those endpoints at /swagger/index.html. Here, you can see your endpoints, and you’re ready to take your app for a spin!
Running a Local Redis Instance Using Docker
While developing locally, connecting to Redis is not advisable due to latency and security concerns. A more suitable option is to run a local instance of Redis using Docker, which allows running applications in lightweight and standalone containers.
Steps to Run a Local Redis Instance
- Install Docker on your machine: Follow this guide to install it.
- Run Redis in Docker: Open a terminal and execute the following command:
docker run --name redis-local -p 6379:6379 -d redis
This command downloads the official Redis image and runs it in a container named redis-local, exposing the default Redis port 6379.
Adding the Redis URL to Your Appsettings.config
Connect your .NET application to the local Redis instance by adding the Redis URL to your appsettings.json file:
{
  "ConnectionStrings": {
    "Redis": "localhost:6379"
  },
  ...
}
When deploying to production, replace the Redis URL with your Redis instance’s URL, and always keep your production keys and URLs secret.
Creating the Scoreboard Component
Create a Blazor component to display the scoreboard and allow players to join a game session and update their scores.
- Add a Blazor Component: Name it Scoreboard.razor in the Pages folder.
- Code for the Scoreboard.razor File:
@page "/scoreboard"
@using ScoreBoard.Models
@inject IHttpClientFactory HttpClientFactory

<h1 class="text-center">Scoreboard</h1>
<div class="form-group">
    <label for="player">Player Name:</label>
    <input type="text" class="form-control" id="player" @bind="player" />
    <button class="btn btn-primary mt-2" @onclick="JoinGame">Join Game</button>
</div>
@if (inGame)
{
    <div class="form-group">
        <label for="score">Your Score:</label>
        <input type="number" class="form-control" id="score" @bind="score" />
        <button class="btn btn-success mt-2" @onclick="UpdateScore">Update Score</button>
    </div>
}
<h2 class="text-center">Top 10 Players</h2>
@if (topScores.Any())
{
    <table class="table table-striped">
        <thead>
        <tr>
            <th>Player</th>
            <th>Score</th>
        </tr>
        </thead>
        <tbody>
        @foreach (var topScore in topScores)
        {
            <tr>
                <td>@topScore.Player</td>
                <td>@topScore.Score</td>
            </tr>
        }
        </tbody>
    </table>
}
else
{
    <p class="text-muted">No scores available.</p>
}
@code {
    private string player;
    private int score;
    private bool inGame;
    private List<PlayerScores> topScores = new();
    private HttpClient Http => HttpClientFactory.CreateClient("ScoreboardClient");

    private async Task JoinGame()
    {
        inGame = true;
        await GetTopScores();
    }

    private async Task UpdateScore()
    {
        var request = new ScoreRequest { Player = player, Score = score };
        var response = await Http.PostAsJsonAsync("/api/score", request);
        if (response.IsSuccessStatusCode)
        {
            await GetTopScores();
        }
        else
        {
    // Handle error
        }
    }

    private async Task GetTopScores()
    {
        var response = await Http.GetFromJsonAsync<List<PlayerScores>>("/api/score");
        if (response != null)
        {
            topScores = response;
        }
        else
        {
    // Handle error
        }
    }

    protected override async Task OnInitializedAsync()
    {
        await GetTopScores();
        await base.OnInitializedAsync();
    }
}
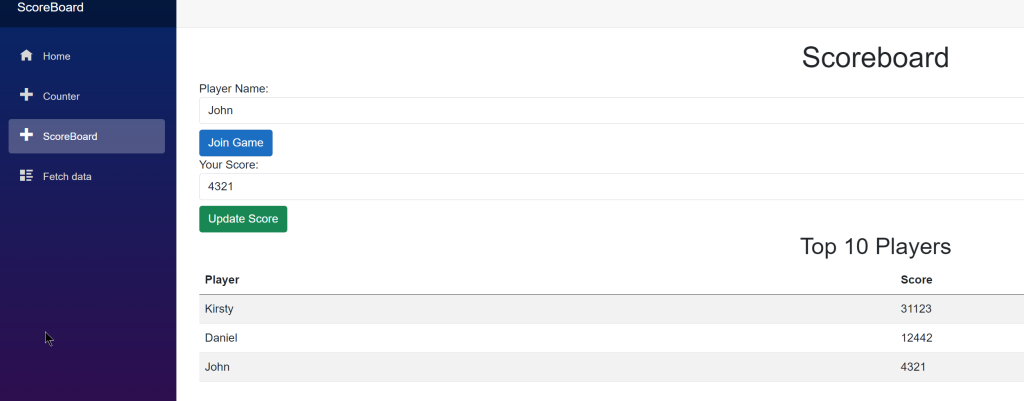
This component provides a form for players to join a game, update their scores, and view the top 10 players.
Adding Navigation Link
Add a navigation link to the scoreboard page:
- Find the NavMenu.razor Component: Add the following code:
<div class="nav-item px-3">
    <NavLink class="nav-link" href="scoreboard">
        <span class="oi oi-plus" aria-hidden="true"></span> ScoreBoard
    </NavLink>
</div>
This link allows navigation to the scoreboard page, accessible at /scoreboard once your app is running.
Running the Application
Run the application using the following command:
dotnet run
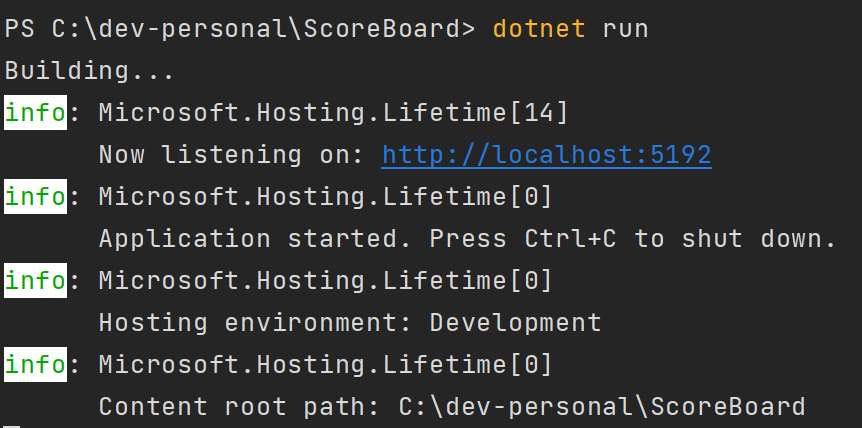
Navigate to http://localhost:5192 and access the ScoreBoard page to add players and scores.
Conclusion
In this post, we explored using Redis as a fast and scalable data store for a .NET 7 application. We created a Blazor Server application with a minimal API back end and implemented a real-time scoreboard using Redis.
Redis offers powerful features such as sub-millisecond response times, high-throughput, concurrent request handling, complex data structures, and real-time capabilities, making it suitable for various use cases beyond just caching.
I hope this tutorial assists you in exploring Redis for your applications. Feel free to reach out with any questions or feedback, and happy coding!

Hi Daniel!
Very nice example.
Worked pretty much out of the box. Illustrating many nice features. Thank you!
btw. You have a little typo in the program.cs : await redisService.AddOrUpdateScoreAsync(request); should be await redisService.AddOrUpdateScoreAsync(request.Player,request.Score);
LikeLike
Hi Tor!
*doh* thank you for spotting this and commenting about it. I’ve updated the post!
LikeLike